With the free ArcSight Logger L750MB, you have download some associated SmartConnectors, Snare SmartConnector, Cisco IOS SmartConnector, Unix Auditd SmartConnector, etc. The configuration of each SmartConnector is customizable in order to activate batching, time correction, caching, QoS (Quality of Service), aggregation or filtering.
In this blog post we will show some examples on how to configure your SmartConnector.
SmartConnector Configuration setup
Under Windows, you will need to run the “runagentsetup.bat” script and under Linux the “runagentsetup.sh” script. The scripts are located into your “$ARCSIGHT_HOME/current/bin” directory.
Changing SmartConnector parameters
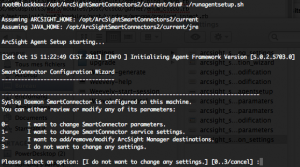
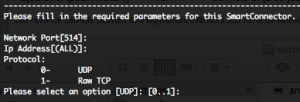
By selecting “0 – I want to change SmartConnector parameters“, you will be able to change, for example on a Syslog Daemon SmartConnector, the network port, listener IP address and associated protocol. You will also able to switch between a standalone application installation or as a service installation.
Changing SmartConnector service settings
By selecting “1 – I want to change SmartConnector service settings“, you will be able, same as for the first option, to switch between a standalone application installation or as a service installation.

Adding/Removing/Modifying SmartConnector Destinations
By selecting “2 – I want to add/remove/modify ArcSight Manager destinations“, you will be able to modify your initial destination configuration, in our case a L750MB Logger, or to add a new destination, for example another Logger or ESM (Enterprise Security Manager)

This configuration option will allow you to add a fail over destination or also to re-register a SmartConnector.
Modifying actual SmartConnector destination parameters
If you select your actual destination you will be able to modify your actual destination parameters “0 – Modify destination parameters” :
- Host name or IP address of the actual destination
- Port of the actual destination
- Receiver Name of the actual destination
- Enable or not compression mode
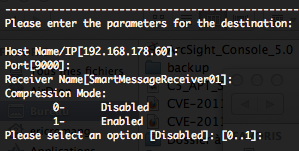
Compression mode will allow the SmartConnector to send events to the destination in a compressed format and lowers the network bandwidth usage.
Adding a fail over destination to your actual SmartConnector
If you need to have a fail over destination for your actual SmartConnector configuration you will have the choice between an ESM or Logger destination. The setup of the fail over destination is the same as creating a first destination, you will have to provide the following information’s :
- Host name or IP address of the fail over destination (Manager or Logger)
- Port of the actual destination (Manager or Logger). 9000 for software Logger, 443 for appliance Logger and 8443 for ESM.
- Receiver Name of the actual destination (Logger)
- Enable or not compression mode (Logger)
Some specific configurations are necessary for an ESM destination like “AUP Master Destination“, “Filter Out All Events“, ESM user name and password, but we will not describe these configurations settings.
Configure multiple parallel destinations
ArcSight SmartConnector is also able to send a copy of events to each additional configured destinations. You could for example send you events in parallel to two Logger’s, or to one Logger and one ESM, or to two ESM. This could be useful to have a copy of the events or to setup a lab environment in parallel of your production environment. You can configure additional destinations by selecting “1 – Add new destination“.

Modifying batching destination settings
SmartConnectors allow you to batch all processed events, in order to increase performance and bandwidth usage, by three options :
- Batching per events : The connector will wait that the provided value of events is reached and then send the block of events to your destination. The default configured value is 100 events.
- Batching per seconds : The connector will wait that the provided value in seconds is reached and then send the block of events to your destination. The default configured value is 5 seconds.
- Batch by time based or severity based : The “Time Based” selection will allow the SmartConnector to send batches as they arrive, how is the default configuration. The “Severity Based” selection will allow the SmartConnector to send batches based upon the events severity (highest first then lowest).
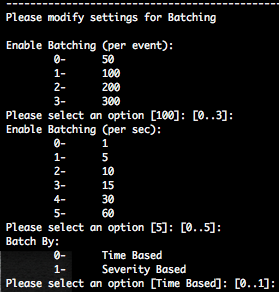
If you have high volume of events, you should prefer the “Severity Based” selection in order to have a focus on high severity events first.
Modifying time correction settings
ArcSight SmartConnector will allow you to do time corrections. For example, if you have a remote SmartConnector how has a valid NTP synchronization :
- The end device could have time troubles, cause no NTP configured or bad NTP configuration.
- The end device could be in a different timezone than the remote SmartConnector.
If the device is in the past, you should normally receive this kind of event:
deviceEventClassID : agent:012
name : Device Receipt Time from [centos5-6-1.zataz.loc|192.168.178.76|Unix|auditd] may be incorrect - Device Receipt Time is smaller than Agent Receipt Time (Events are in the past)
deviceEventCategory : /Agent/Time/Device?Failure
deviceReceiptTime : The device time how is in the past.
agentReceiptTime : The time of the SmartConnector.
If the device is in the future, you should normally receive this kind of event:
deviceEventClassID : agent:012
name : Device Receipt Time from [centos5-6-1.zataz.loc|192.168.178.76|Unix|auditd] may be incorrect - Device Receipt Time is greater than Agent Receipt Time (Events are in the future)
deviceEventCategory : /Agent/Time/Device?Failure
deviceReceiptTime : The device time how is in the futur.
agentReceiptTime : The time of the SmartConnector.
By setting “Use Connector Time as Device Time” to yes, the SmartConnector will override the reported device time by using the SmartConnector time.

Also you will able to provide a “Device Time Correction” in seconds for all devices how are sending they’re events to this SmartConnector. You will also be able to provide a “SmartConnector Time Correction” in seconds, if the server where the SmartConnector is installed don’t has a synchronized NTP.
Another example of time correction is if the device doesn’t have a valid configured timezone or if the device events don’t report the timezone, you can through this option specify the desired timezone on the SmartConnector.
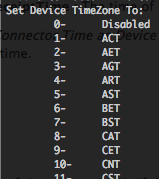
In “$ARCSIGHT_HOME/logs/agent.log” file, you can see that these settings are activated by :

But take care, time correction is not a setting to configure without knowing what you are doing. If you modify the timestamp of the events, you will :
- Gain the ability to do events searches, generate reports or valid correlation rules on the ESM or Logger based on the same timestamp.
- Loose the “real” timestamp of the events, if you don’t preserve raw events. In case of forensics purpose to loose the “real” timestamp could be dramatically.
Modifying time auto-correction settings
With time auto-correction you will be able to specify forward and backwards time limits for your events. If the values are exceeded the SmartConnector will automatically correct the time with the SmartConnector time. By default the “-1” values are disabling the auto-correction, you can specify values in seconds for the forward and backwards time limits, and also filter by devices separated by commas.
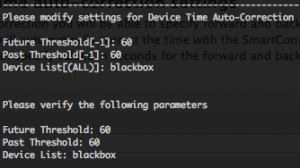
In “$ARCSIGHT_HOME/logs/agent.log” file, you can see that these settings are activated by :

Modifying time checking settings
These settings will allow you to specify the time threshold and frequency for device time checking. By the SmartConnector will forward events how are 300 seconds in the future and forward events how are 3600 seconds in the past, compared to the SmartConnector time.

Modifying Cache settings
If the configured events destinations are down, or if the number of EPS are to high to be forwarded by batching, the SmartConnector will begin to cache the events. With the cache settings you will be able to adjust your cache size from 5MB to 50GB (by default 1GB), after how many events the SmartConnector will trigger a notification, by default 10 000 events, and the frequency of these notifications from 1 minute to 60 minutes, by default every 10 minutes.

The cache will work in a FIFO mode (First in, First out) if the cache is full, so you have to adjust you cache depending on the number of EPS of the device. For example a device with 25 EPS, and with an average size of 300 bytes per event, you will have the default 10 000 events threshold limit reached in 400 seconds, and the default 1 GB cache size reached in 143 165 seconds (39 hours). But you have also to take into account the aggregation settings how will reduce drastically the size of events in your cache.
Cache files are stored in “$ARCSIGHT_HOME/current/user/agent/agentdata” folder.
If the SmartConnector is caching you will have this kind of event :
deviceEventClassID : agent:019
name : Agent is currently caching events
message : Agent cache contains [100] events
deviceEventCategory : /Agent/Cache/Caching
If the SmartConnector is emptying his cache :
deviceEventClassID : agent:020
name : Agent cache empty
deviceEventCategory : /Agent/Cache/Empty
In the next blog post we will continue to describe SmartConnector network, field based aggregation, filter aggregation, processing and filters settings.


