Category Archives: Event Management

Event management process objective is to provide the entry point for the execution of many service operation processes and activities. In addition, it provides a way of comparing actual performance and behavior against design standards and Service Level Agreements. Other objectives include: Provides the ability to detect, interpret and initiate appropriate action for events. Basis for operational monitoring and control and entry point for many service operation activities. Provides operational information, as well as warnings and exceptions, to aid automation.Supports continual service improvement activities of service assurance and reporting and service improvement.

Why And Howto Calculate Your Events Log Size

If you are projecting to start a Log or Event Management project, you will surely need to know your Normal Event log size (NE). These Normal Event log size (NE) value, combinated with the your Normal Events per second (NE) value and with your storage retention policy will help you to design in order to estimate your storage requirements.

Never forget that Log Management storage requirements are not the same for Event Management. Most of time Log Management storage requirements are higher than for Event Management. For example for Log Management, PCI-DSS v2.0 Req. 10.7 require 1 year retention :

10.7 Retain audit trail history for at least one year, with a minimum of three months immediately available for analysis (for example, online, archived, or restorable from back-up).

But in order to compensate PCI-DSS v2.0 Req. 10.6, you will maybe do Event Management with a SIEM (like ArcSight ESM, RSA enVision, QRadar SIEM, etc.).

10.6 Review logs for all system components at least daily. Log reviews must include those servers that perform security functions like intrusion-detection system (IDS) and authentication, authorization, and accounting protocol (AAA) servers (for
example, RADIUS). Note: Log harvesting, parsing, and alerting tools may be used to meet compliance with Requirement 10.6

You don’t need a SIEM to do Log Management, but you also don’t need to store 1 year of your logs on your SIEM solution. Long term retention, long term reporting, “raw” events forensics are mostly done on a Log Management infrastructure (like ArcSight Logger, QRadar Log Manager, Novell Sentinel Log Manager, etc.). Storage retention for your Event Management infrastructure will depend mostly on your correlation rules, your acknowledge time on a correlated event, the number of security analysts present in your SOC, etc.

Don’t imagine that a magic formula exist to define your events log size, some tools could help you, but you need to analyze your logs in order to have your Normal Event log size.  First of all you have to define your Log and/or Event Management scope, this scope could first be driven by regulations or compliances, but don’t forget that regulations or compliances are not Security. Also each technologies have different log sizes, an Apache HTTPD log will not have the same size than a SSHD log, and an Apache HTTPD log from server A will surely not have the same size than an Apache HTTPD log from server B.

xxx.xxx.xxx.xxx - - [25/Aug/2011:04:23:47 +0200] "GET /feed/ HTTP/1.1" 304 - "-" "Apple-PubSub/65.28"

This log from Apache HTTPD server A has a size of 102 bytes.

xxx.xxx.xxx.xxx - - [25/Aug/2011:04:15:08 +0200] "GET /wp-content/themes/mystique/css/style-green.css?ver=3.0.7 HTTP/1.1" 200 1326 "http://eromang.zataz.com/" "Mozilla/5.0 (Windows; U; Windows NT 5.1; en-US; rv:1.9.2.20) Gecko/20110803 Firefox/3.6.20 ( .NET CLR 3.5.30729)"

This log from Apache HTTPD server B has a size of 274 bytes.

Also, depending the Log or Event Management infrastructure product, you need to consider event generated by intrinsically mechanism. For example, in order to search in your events most of products are creating indexes, these indexes are representing an average of twice the time of the size of the event. Also another intrinsically mechanism is that these products are also monitoring themselves, regularly executing tasks, do some statistics for dashboards or reports.

I have develop a bash script how will permit you to analyze all your archived logs and gather the following informations:

  • For each archived files, the total number of events, the total uncompressed size of the events, the Normal Event log size.
  • The total events for all archived files.
  • The total uncompressed size of all events in all archived files.
  • The grant total Normal Event log size.
  • The average event number per archived files.
  • The average bytes per archived file.

You can download this script by clicking on this link. A reminder, the provided Normal Events per second value, is not your real EPS rate, just check my previous blogpost regarding on “Why and howto calculate your Events Per Second“.

ArcSight SmartConnectors silent mass upgrade

Since the Jun 2, ArcSight has release a new version of the free ArcSight Logger L750MB (5.1.0.5887.0) and for related SmartConnectors (5.1.3.5875.0). You can download these updates from ArcSight Download Center.

In my previous blogpost we have document on how silently mass install SmartConnectors, in this new blogpost we will see on how upgrade these SmartConnectors also silently. This blogpost is only applicable if you have standalone SmartConnectors, not connected to a Connectors Appliance, L3x00 Logger Appliance serie (whow integrate a Connectors Appliance) or directly connected to ArcSight ESM SIEM.

The previous installed SmartConnectors version was 5.0.2.5703.0, you can check your SmartConnector version by executing this command.

First of all you need to completely install, for example, a Windows Syslog SmartConnector as described in my previous “Syslog SmartConnector and Snare installation“.

After the SmartConnector 5.0.2.5703.0 installation start to install the 5.1.0.5887.0 version. You will see this following screen, just click “OK” to continue.

Later during the installation process, if you see the following screen just click on the “Cancel” button.

Open a command prompt and go to the SmartConnector installation directory (ex : C:\Program Files\ArcSightSmartConnectors) and execute the following command.

The “recorderui” start option will allow you to record the installation process in order to create a mass installation properties configuration file.

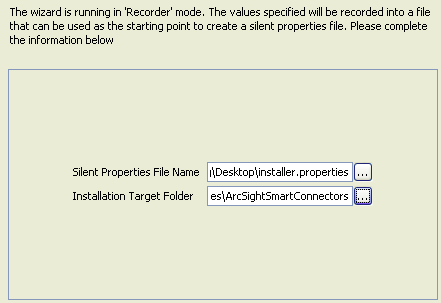
The installation wizard will propose you to select a “Silent Properties File Name” and a typical “Installation Target Folder“.

Create an “installer.properties” file on your desk and select it in the wizard. Also select a default installation folder, for example “D:\ArcSightSmartConnectors“. Now you can continue your typical SmartConnector configuration.

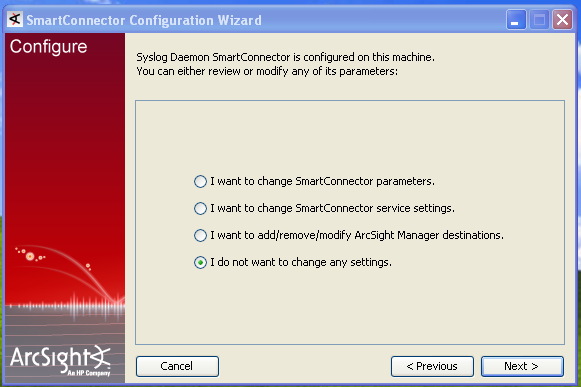
When you see this screen, check the “I do not want to change any settings” as described in the following screenshot.

Finish the setup, and you can examine your “installer.properties” file to adapt the properties with your needs.

Adapt the “USER_INSTALL_DIR” and “ARCSIGHT_AGENTSETUP_PROPERTIES” variables to your needs.

Now you can upgrade all your SmartConnectors in silent mode. If a properties file named either “installer.properties” reside in the same directory as the installer, it will automatically be used, overriding all other command line options, unless the “-f” option is used to point to another valid properties file.

The “-f” option can be used by following command line.

ArcSight SmartConnectors silent mass installation

With your free ArcSight L750MB Logger you can mass install ArcSight SmartConnectors with a silent properties configuration file. If you have to install, for example, 10 or more Syslog SmartConnectors, you will win time by reading this blog post.

First of all you need to create a properties configuration file template by installing a typical SmartConnector, with typical settings. Just start to install, for example, a Windows Syslog SmartConnector as described in my previous “Syslog SmartConnector and Snare installation“.

During the installation process, if you see the following screen just click on the “Cancel” button.

Open a command prompt and go to the SmartConnector installation directory (ex : C:\Program Files\ArcSightSmartConnectors) and execute the following command.

The “recorderui” start option will allow you to record the installation process in order to create a mass installation properties configuration file.

The installation wizard will propose you to select a “Silent Properties File Name” and a typical “Installation Target Folder“.

Create an “installer.properties” file on your desk and select it in the wizard. Also select a default installation folder, for example “D:\ArcSightSmartConnectors“. Now you can continue your typical SmartConnector configuration.

You can examine your “installer.properties” to adapt the properties with your needs.

For each SmartConnector you have to install you need to adapt into your “installer.properties” file :

– The SmartConnector name : AgentDetailsPanel.agentname
– The optional SmartConnector location : AgentDetailsPanel.agentlocation
– The optional device location : AgentDetailsPanel.devicelocation
– The optional comment : AgentDetailsPanel.comment

Now you can install all your SmartConnectors in silent mode. If a properties file named either “installer.properties” reside in the same directory as the installer, it will automatically be used, overriding all other command line options, unless the “-f” option is used to point to another valid properties file.

The “-f” option can be used by following command line.

ArcSight Cisco IOS SmartConnector installation with Dynamips and Dynagen

In my previous blob posts I have explain on how to install ArcSight Logger L750MB, how to setup a Windows Snare SmartConnector, some useful ArcSight SmartConnector commands and on how to backup your Logger configurations. This new blog post will explain you on how to setup a Cisco lab with Dynamips and Dynagen and how to setup an ArcSight Cisco IOS SmartConnector. The ArcSight Cisco IOS SmartConnector supports 2600 series and above with IOS 11.3, 12.4, 15.0, and 15.1.

Dynamips and Dynagen lab setup

First of all my lab is running under Ubuntu 10.04.2 LTS. Dynamips is a Cisco router emulator, but he can also emulate switches and Cisco PIX/ASA. Dynagen is a front-end for Dynamips. “Dynagen takes care of specifying the right port adapters, generating and matching up those pesky NIO descriptors, specifying bridges, frame-relay, ATM switches, etc. It also provides a management CLI for listing devices, suspending and reloading instances, determining and managing idle-pc values, performing packet captures, etc.”.

You have to create a “dynamics” folder into your “/opt” directory.

Download the latest Dynagen version and uncompress the archive in the “dynamips” folder. My lab Dynagen version is 0.9.1 and this specific version require at least version 0.2.8-RC1 of Dynamics. Download version 0.2.8-RC1 of Dynamics and use the “chmod 755” command to make the Dynamips binary executable.

Create symbolic links, in “/usr/sbin” for the Dynagen and Dynamips programs.

cd /usr/sbin
ln -s /opt/dynamips/dynagen-0.11.0/dynagen dynagen
ln -s /opt/dynamips/dynamips-0.2.8-RC1-x86.bin dynamips

Create a directory for Cisco IOS images.

Download you Cisco IOS images into the “images” directory. To find Cisco IOS images you can use some Google dorks.

For 7200 search with intitle:index.of c7200*.bin -site:cisco.comTry

For 3660 search with intitle:index.of c3660*.bin -site:cisco.comTry

For PIX search with intitle:index.of cisco pix*.bin -site:cisco.comTry

For my lab I have use the “c7200-adventerprisek9-mz.124-4.T1.bin” IOS image. You will maybe need to uncompress the IOS image archive.

Then create a “lab_router.net” file into “/opt/dynamips/dynagen-0.11.0/sample_labs” directory. Here under my “lab_router.net” configuration.

[localhost]
[[7200]]
ram=256
image = /opt/dynamips/images/c7200-adventerprisek9-mz.124-4.T1.bin
nep = npe-400
[[router R1]]
model = 7200
f0/0 = NIO_tap:tap0
f1/0 = NIO_gen_eth:eth0

Maybe you have to adapt your IOS image file path.

Now you have to create a TUN/TAP interface on your Linux box.

Install “uml-utilities” package.

Load the TUN/TAP driver into the kernel.

Create a TUN/TAP interface by invoking the “tunctl” command. Enable the “tap0” interface and configure an IP address for it.

Remove your existing “eth0” interface configuration with the following command.

Add a default route that points to the router interface connected to the “tap0” interface.

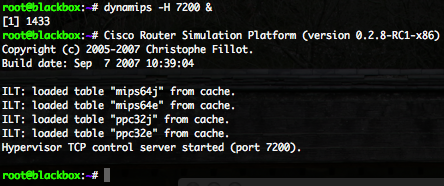
Now start the dynamics process with the following command. Not that the “&” character instruct the process to run in the background.

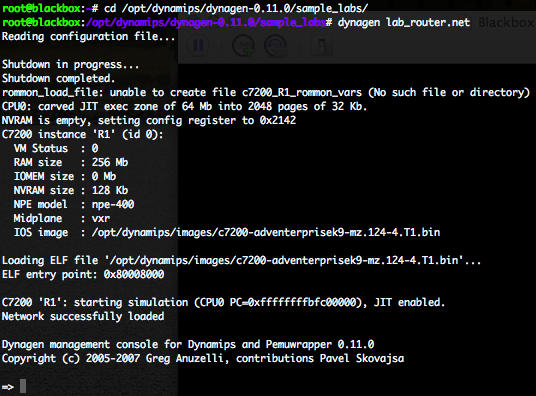
Use the “dynagen” command to process the “lab_router.net” configuration file and start the virtual network.

The Dynagen “list” command will permit you to list the network equipment and the the TCP port for console access.

Connect you with telnet on “localhost” port “2000” to get access to the router.

On the first router configuration question response “no“.

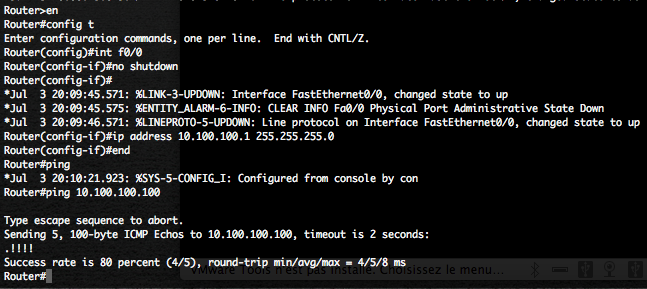
Perform the following tasks on the router, to configure the “f0/0” router interface how is mapped to the TUN/TAP “tap0” interface.

  • Enter in configuration mode.
  • Enable the “f0/0” interface
  • Provide an IP address for this interface
  • Try to ping the “tap0” interface

Now provide Cisco passwords.

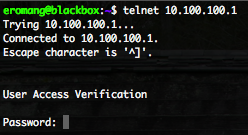
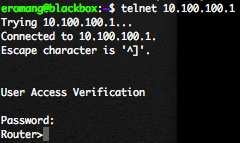
At this point you can connect you, with telnet, from the Linux box to the Cisco router directly on IP 10.100.100.1.

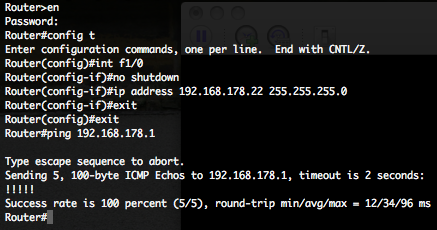
Perform the following tasks on the router, to finish our router configuration to have the possibility to communicate with external world.

  • Enter in configuration mode.
  • Enable the “f1/0” interface
  • Provide an IP address for this interface, here 192.168.178.22.
  • Try to ping the default gateway for 192.168.178.0/24 network, here 192.168.178.1.

Your Cisco router is now able to communicate with outside world.

ArcSight Cisco IOS SmartConnector installation and setup

If you have an existing Syslog UDP daemon, for example the SmartConnector configured in the Snare Windows blog post, you don’t need to follow the installation and setup. ArcSight Cisco IOS SmartConnector is considered as a “sub connector” for Syslog SmartConnector. All Cisco IOS messages how will be received by the Syslog UDP daemon are recognized coming from a Cisco IOS, but the same Syslog UDP daemon can also receive Windows Snare, Snort, Juniper NSM, JunOS, Red Hat Linux Audit messages. Cisco IOS Syslog message will be converted into SmartMessage (CEF) format.

First verify that you don’t have any existing Syslog UDP daemon how is running on the box, you can use “netstat -uan” to verify this.

Upload the “ArcSight-5.0.2.5703.0-Connector-Downloadable-Logger-Linux.bin” binary available from the ArcSight Download Center, and use the “chmod 755” command to make the binary executable.

Execute the binary in order to install the SmartConnector.

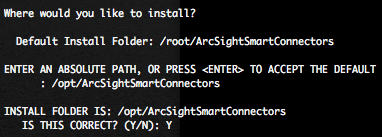
Press “Enter” twice times, provide the installation directory, in our case “/opt/ArcSightSmartConnectors” and confirm the installation.

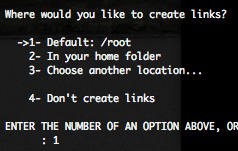
We recommend you to create a links in order to remove the SmartConnector.

Once the SmartConnector installed you need to configure him.

Select the destination type that you want to configure for this SmartConnector, in our case it will be the L750MB Logger.

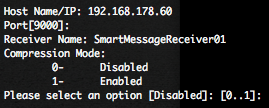
Provide the hostname or IP address of the Logger, the destination port (for Logger software version the port is 9000/TCP), and the Receiver Name (available in the Configuration -> Event Input / Output menu of the Logger).

Select “Syslog Daemon(syslog)” as SmartConnector to install, don’t change the network IP, port and protocol (514/UDP).

Provide a SmartConnector name, don’t forget that the SmartConnector could also receive Syslog messages from other devices than Cisco IOS.

Select if you want to install the SmartConnector as a service or as a standalone application, in our case we will stay in standalone mode.

Now you have to start the SmartConnector by executing the following commands.

The SmartConnector is waiting for messages and is running (ET=Up, HT=Up).

Configure Cisco IOS for event collection

Log again on the Cisco router with telnet.

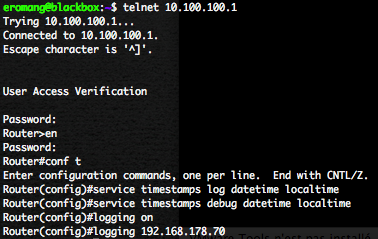
Execute the following steps to enable Cisco IOS event collection.

  • Enter in enable mode.
  • Enter in configuration mode.
  • Enable Time-Stamps on Log Message
  • Enable System Message Loggin
  • Set the Syslog Destination, in our case the Syslog UDP daemon SmartConnector.

In your ArcSight SmartConnector console, you will see that the first Cisco vendor and CiscoRouter product message has been received by the SmartConnector.

Also if you check the “/opt/ArcSightSmartConnectors/current/logs/agent.log” log file, you will see these messages.

[2011-07-03 21:20:33,717][INFO ][default.com.arcsight.agent.loadable._EventCounter][processSingleAlert] First event from [CISCO|CiscoRouter||192.168.178.22] received.

[2011-07-03 21:20:38,033][INFO ][default.com.arcsight.common.eb.a][processSingleAlert] Succesfully loaded categorization file [cisco/ciscorouter_xr.csv]

[2011-07-03 21:20:45,419][INFO ][default.com.arcsight.agent.loadable._DeviceEventCounter][processSingleAlert] New device found [|192.168.178.22|CISCO|CiscoRouter]. Starting counters.

In your Logger you will see all Cisco events.