ArcSight Logger propose different kind of receivers :
- UDP receiver for UDP messages, such as SYSLOG.
- TCP receiver for TCP messages, such as SYSLOG how can also be sent with TCP.
- CEF UDP receiver for CEF (Common Event Format) messages sent through UDP.
- CEF TCP receiver for CEF (Common Event Format) messages sent through TCP.
- SmartMessage receiver for encrypted SmartMessage messages sent by SmartConnectors.
- File Transfer to read remote logs using scp, sftp or ftp.
- File Receiver to read logs from a local or remote file system such as NFS, CIFS or SAN.
In my previous blog posts, we configured SmartConnectors to send they’re messages to the Logger SmartMessage receiver. The SmartMessage reception method is the most used in an typical ArcSight Log Management infrastructure. With SmartConnectors and SmartMessage receiver usage you can benefit of :
- SmartConnector normalization, categorization, aggregation, batching and filtering.
- SmartMessage encrypted transmission of messages.
But it could happen that you need to collect events without SmartConnector or FlexConnector. For examples, maybe you have an existing network file system (NFS) to centralize all your Apache HTTP Server logs files, or maybe you are not allowed to install SmartConnector on a system and the policy doesn’t allow to send messages through UDP. File Receiver Logger receivers will provide you alternatives in order to still collect the events.
File Receiver Configuration
ArcSight Logger File Receiver allow you to read files from a network file system (NFS) CIFS, or storage area network (SAN). But the free ArcSight Logger L750MB only allow you File Receiver through a local share. So the ArcSight Logger L750MB processes, how are running under “arcsight” user and group should have the permissions to read and/or write into this share.
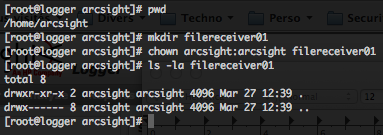
In order to setup a File Receiver for ArcSight Logger L750MB, first create a “filereceiver01” folder in “$ARCSIGHT_HOME“. Or you can mount a NFS, CIFS or SAN on the Logger filesystem.
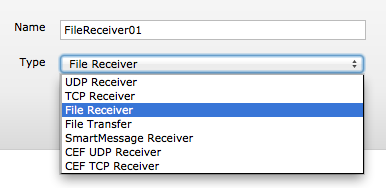
Then log into the Logger Web interface and go into “Configuration -> Event Inpout/Output“. Click on the “Add” button, give a name to your File Receiver (for example: FileReceiver01), select “File Receiver” in the pull-down list and click on the “Next” button.
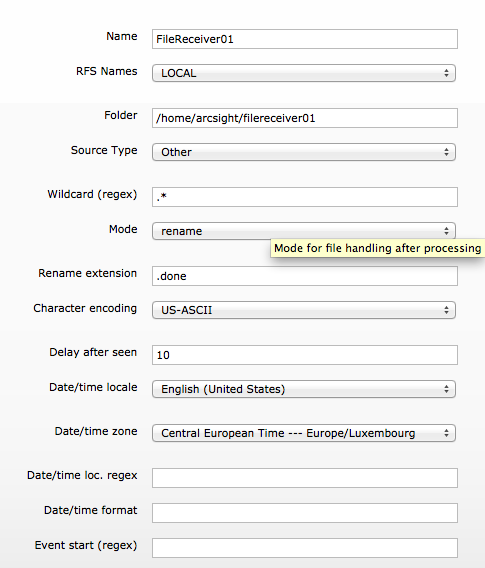
To complete the setup specify the following information’s :
- RFS Names : On a L750MB Logger you can only select “LOCAL“, but on a appliance Logger you can select the previously declared NFS, CIFS or SAN share.
- Folder : Specify the folder name, in our example “/home/arcsight/filereceiver01“.
- Source Type : Select from the pull-down list your log file types. “Microsoft DHCP Log“, “Juniper Steel-Belted Radius“, “Apache HTTP Server Error“, “Apache HTTP Server Access“, “IBM DB2 Audit” or “Other“. The “Other” choice will allow you to import all kind of logs.
- Wildcard (regex) : Allow you through regular expressions to describe the log file to read. “.*” mean all files.
- Mode : Select from the pull-down list. With “Persist” mode, the Logger will remember which files have been processed and only processes them once. With “Rename” mode will rename the log file once it has been processed. With “Delete” mode, the file is deleted once it has been processed.
- Rename extension : If you have select the “Rename” mode, specify the suffix to append to the log files. By default “.done“.
- Character encoding : Select the log file character encoding.
- Delay after seen : Specify the number of seconds to wait after a source file is first seen until it is processed. This allows the entire file to be copied before processing begins. By default “10” seconds.
- Date/time locale : Select from the pull-down list your locale.
- Date/time zone : Select from the pull-down list your time zone, if no time zone is specified into the log file. By default, the time zone is the Logger time zone.
- Date/time loc. regex : Allow you through regular expressions to describe which characters represent the timestamps in the log file. By default no timestamp in the log file.
- Date/time format : If timestamps are present in the log file, specify the format of the timestamps through format specifiers. By default no timestamps in the log file.
- Event start (regex) : If you’re log files are multi-line, you can specify a regular expression how describe the start of a new event in the log file. By default, each line in the log file is considered as a single event.
Then save your configuration. You will have to active the File Receiver by clicking on the right button.

Directly after activating the File Receiver a Device will be created into “Configuration -> Devices“. In order to search easily on the File Receiver events, I recommend you to create a dedicated Device Group (ex : FileReceiver), from “Configuration -> Devices -> Device Groups“, and to associated the newly created File Receiver with this new Device Group.

Also I recommend you, to dedicate a Storage Group (ex : File Receivers) to all events coming from the File Receivers, from “Configuration -> Storage -> Storage Groups“. You can rename on existing Storage Group and adapt the associated retention period and maximum size.

Associate the created Device Group with the renamed Storage Group by Storage Rules, from “Configuration -> Storage -> Storage Rules).

Finally you have to restart the File Receiver by clicking twice on the right button. If you don’t restart the receiver, the Device and Storage Groups associated with the receiver are not active.

Retrieving events from File Receiver
If you have create dedicated Device Groups and/or Storage Groups for both File Receiver, you will be able to easily find the associated events through the Logger search engine.
For searches on Device Groups, just type the following command, where “FileReceiver” is you Device Group.
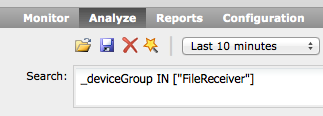
For searches on Storage Groups, just type the following command, where “File Receivers” is your Storage Group.
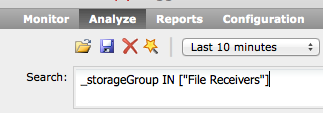
You can also mix all these search parameters.
Receivers Debugging
All activities related to the Logger Receivers are located in the “/home/arcsight/current/arcsight/logger/logs/logger_receiver.log” log file.

“receiver_https” is corresponding to the SmartMessage Receiver, and “rfs_file_receiver” to the newly added File Receiver.
“Eps(SLC)” is corresponding to the current EPS rate, “Total Events” is the total number of events the receiver has processed since the last restart, “Eps(max)” the maximum EPS rate the receiver has processed since the last restart, “Bps(SLC)” the bytes per second the receiver has processed.
